Securing SonicWall SSLVPN on TZ and NSA firewalls
UPDATE - 7th August 2025 11am:
SonicWall are confident the issue is NOT connected to a zero-day vulnerability.
There is a significant correlation with threat activity related to CVE-2024-40766, previously disclosed, in advisory SNWLID-2024-0015.
SonicWall are investigating fewer than 40 related incidents which seem to relate to migrations from Gen 6 to Gen 7 firewalls, where local user passwords were carried over and not reset (this is for installations where users are configured locally on the firewall rather than using LDAP/Radius etc ...). Resetting passwords was a critical step outlined in the original advisory.
SonicOS 7.3 has additional protection against brute-force password and MFA attacks. Without these protections, password and MFA brute force attacks are more feasible.
SonicWall has issued the following updated guidance for all customers, particularly those who have imported configurations from Gen 6 to newer firewalls. We urge you to take the following immediate actions:
1. Update firmware to version 7.3.0. Firmware update guide - Firmware update guide
2. Reset all local user passwords for any accounts with SSLVPN access.
3. Continue applying recommended best practices:
Enable Botnet Protection and Geo-IP Filtering
Remove unused or inactive user accounts
Enforce MFA and strong password policies
We will keep you updated as the situation evolves. As previously mentioned, all the latest updates are available in full on SonicWall's KB article HERE. This article will be continually updated.
Tuesday 5th August 4pm:
Instructions for customers with SSL-VPN running on Generation 7 firewalls affected by potential security vulnerability
| How to disable SSLVPN on your SonicWall firewall |
SonicWall have advised that the most secure precaution is to disable SSL-VPN on your appliance. If you are not actively using SSL-VPN, or if you are able to arrange an alternative remote access solution then you should do this as a matter of urgency.
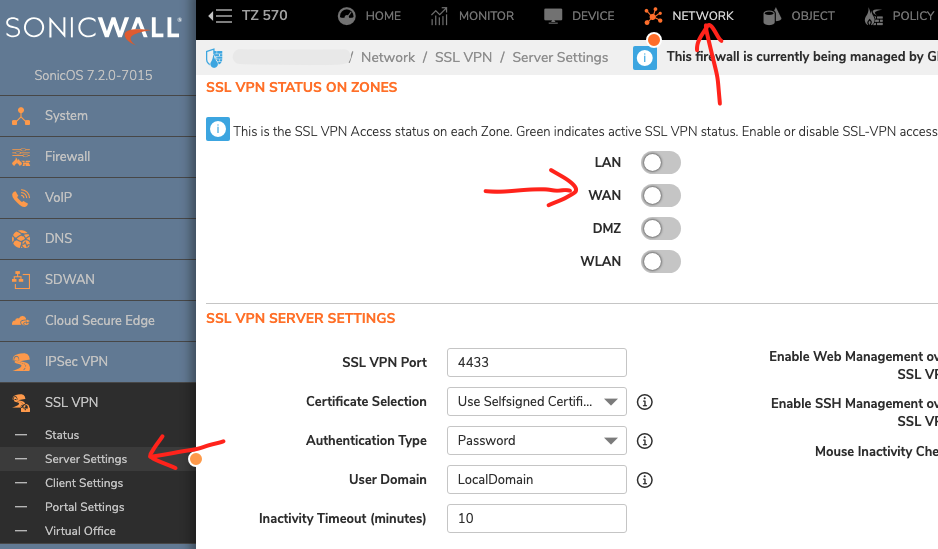
Step 1
Select Network from the top menu.
Then go to SSL VPN - Server Setings.
Disable access from the WAN as per the screenshot below.
| How to lock down SSLVPN to specific IP addresses |
If you are unable to turn off SSL-VPN on your appliance then you should lock it down by IP address, immediately restricting access to a minimal allow-list of known, trusted IP addresses.
Step 1
You will first need to collect the IP (v4) address that each of your remote users is connecting from, if your users are unable to find this then you can use a service such as https://whatismyipaddress.com/ which will display the IP address of the connection your user is on.
Step 2
In order to restrict IP addresses on the default SSLVPN rule you will need to enable editing of default rules.
Access the diag page on your SonicWall firewall by appending /sonicui/7/m/mgmt/settings/diag to your firewall's IP address in your browser address bar.
For example, if your firewall's IP is 192.168.168.168, you would enter https://192.168.168.168/sonicui/7/m/mgmt/settings/diag
Step 3
Next, click on ‘Internal Settings’
Scroll down to the Firewall Settings section and, if greyed out, toggle the switch next to ‘Enable the ability to remove and fully edit auto-added access rules' as per screenshot below:
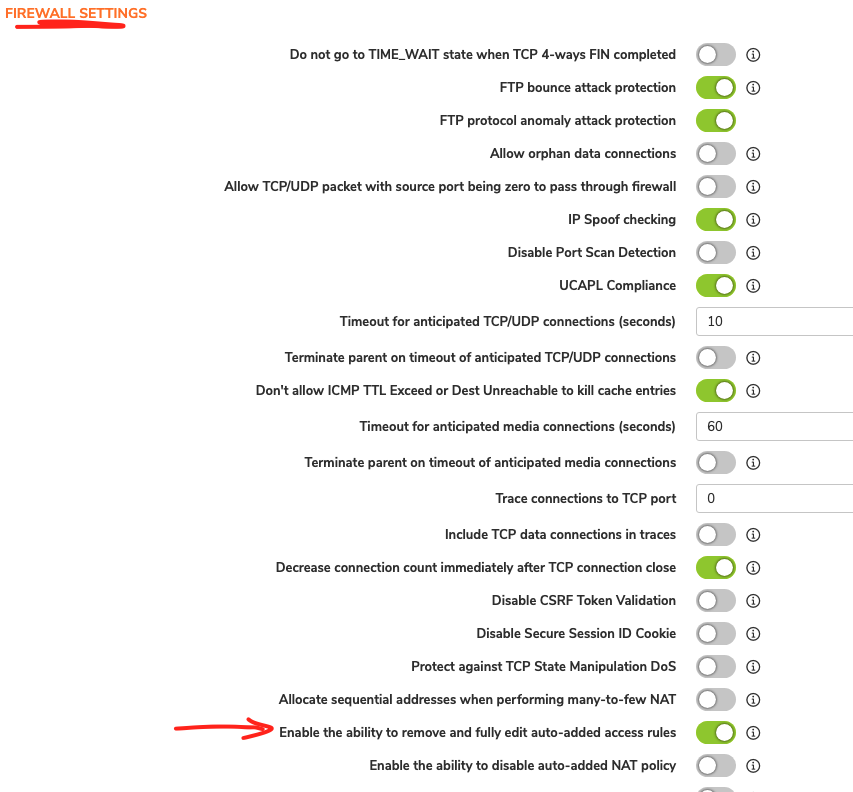
At the top of the page, click ‘Accept’.
Next click on ‘Exit Internal Settings’ to return to the normal firewall management section.
Step 4
You will now need to add the source IP addresses to be added to an allowed group that will have access still to SSL VPN.
To do this, navigate to Object – Match Objects – Addresses.
Click Add and ensure that all IP addresses are of type Host and in the WAN zone as below:
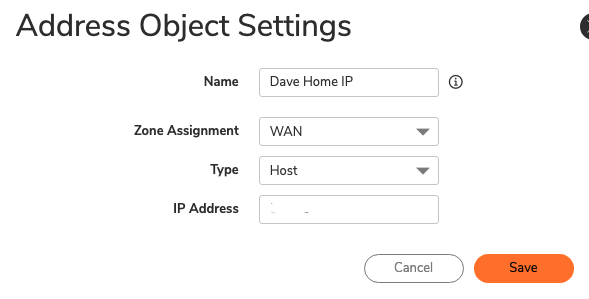
Repeat this step as many times as needed for each of your remote users.
Step 5
Finally, add these users to a group by selecting ‘Address Groups’ from the top of the page.
Click ‘Add’.
Give your group a name, and then select all of the SSL VPN source objects that you have just created and click on the right single arrow in the middle to move them across into the group.
Click ‘Save’.
Step 6
Next click on Policy in the top menu, then Rules and Policies – Access Rules.
Find the access rule for your SSL VPN access that will look like the below:

Hover over the rule and select the pen icon to edit the rule.
Next in the Source – Address box, drop down the list to find the Address Group that you just created and select it.
Next click ‘Save’.